
12 Jun 2026
Pit firing and the magic of smoke: materials and results to start experimenting
If there's one technique I'm completely in love with, it's smoke firing in a pit —pit firing—. There's no glaze, no exact recipe and, above all, no way of fully knowing what you'll find when you open the pit. Every piece comes out unique, with its deep blacks, its copper glints and those warm blushes that seem painted by the fire itself.
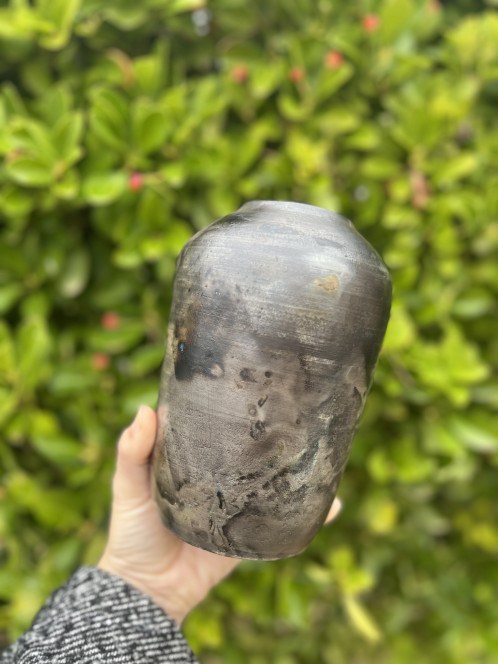
In this post I'll tell you, calmly and from my own experience, how I prepare the pieces, how I build the pit, which materials I like to keep trying and what they usually give me. That said, I'll warn you now and I'll repeat it without any shame: none of this is guaranteed. They're tendencies, hints, starting points. You don't decide the final result: the fire does. And that, precisely, is where all the charm lies. ✨
What is smoke firing in a pit, or pit firing?
It's probably the oldest way of firing clay: a hollow in the ground (or a metal drum), material that burns and a piece that surrenders to the smoke. Since it carries no glaze, all the decoration happens on the bare surface of the clay, from the carbon, the vapours of the salts and the metallic oxides. That's why it's so organic and so unpredictable.
Why burnish and use terra sigillata?
Before firing, I like to leave the piece burnished (polished with a stone or the back of a spoon) or covered with terra sigillata, that ultra-fine clay in suspension that slightly seals the pores and leaves a satin finish. The more polished the surface is, the sharper and more brilliant the smoke marks turn out afterwards, almost metallic. Then I do a low-temperature bisque firing (around 850–950 °C) so the piece can withstand handling without losing porosity: we need the smoke to be able to get in.
Remember: I say «usually», «tends to» and «more or less» on purpose. Fire doesn't sign contracts, and that's part of the magic.
How I build the pit
The idea is always the same: surround the pieces with combustible material and the minerals that will leave colour, light it from the top and let the fire front come down slowly. The slower and steadier the combustion, the more time the smoke has to settle and «draw».**
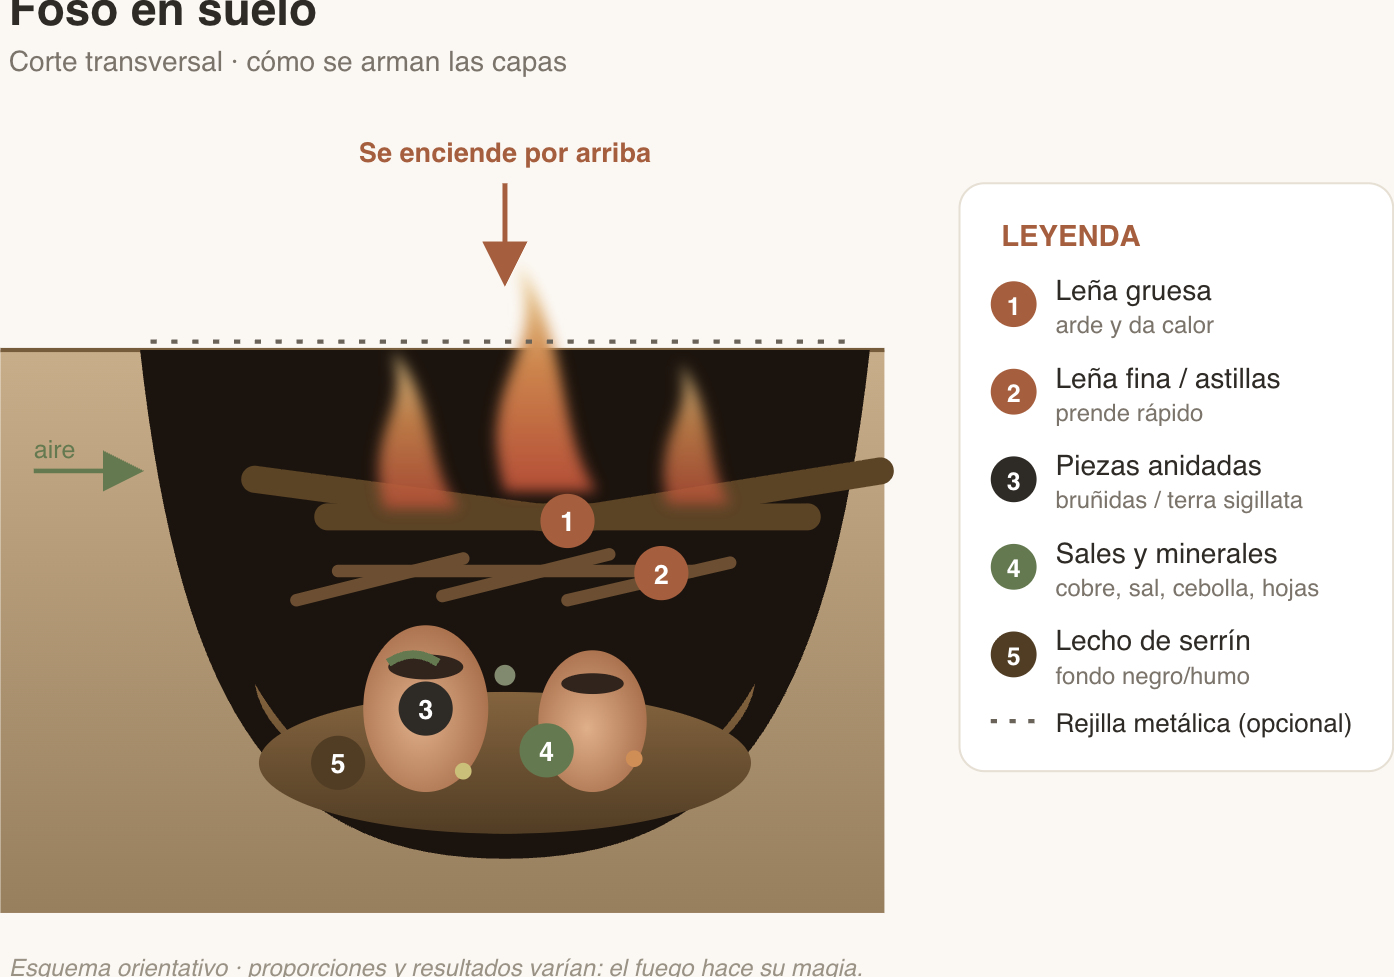
A detail I learned through trial and error: the position of each material in relation to the piece matters enormously. Something resting directly on the clay leaves a very different mark from something that only brushes it with its vapour. That's why two almost identical pieces, in the same pit, come out different. And it's perfectly fine that it should be so.
Materials to experiment with (and what they usually give)
This is my favourite part: putting together a little «pantry» and noting down what happens with each thing. Here are my classics. Read them as hints, never as closed recipes:
- Sawdust and shavings** → the base of almost everything: smoky blacks and greys that unify the piece.
- Copper sulphate / carbonate → the most theatrical: coppers, turquoises, blues and metallic reds… or almost nothing, depending on the air.
- Onion skins → very lovely warm browns, golds and reddish tones.
- Banana / citrus peels → pinkish and orange blushes, delicate halos.
- Coarse salt → intensifies the shine and leaves defined marks and edges where it settles.
- Seaweed and dry leaves → they leave their silhouette; sometimes greens if they carry sea salts.
- Iron oxide → deep earth tones: reds, ochres and browns.
**A guide to the tones each material tends to give… remember: only a guide.
Same copper, same pit, two different days: one day it gives you a postcard red and the next, a greyish whisper. It's not that anything fails. It's that the fire works its magic**.
Step by step: how I do a smoke firing
- **Prepare the fire.**Build up a good layer of live embers in the bonfire or the pit.
- **Treat the piece.**Coat the surface with the copper solution (water and a pinch of salt) and let it dry completely.
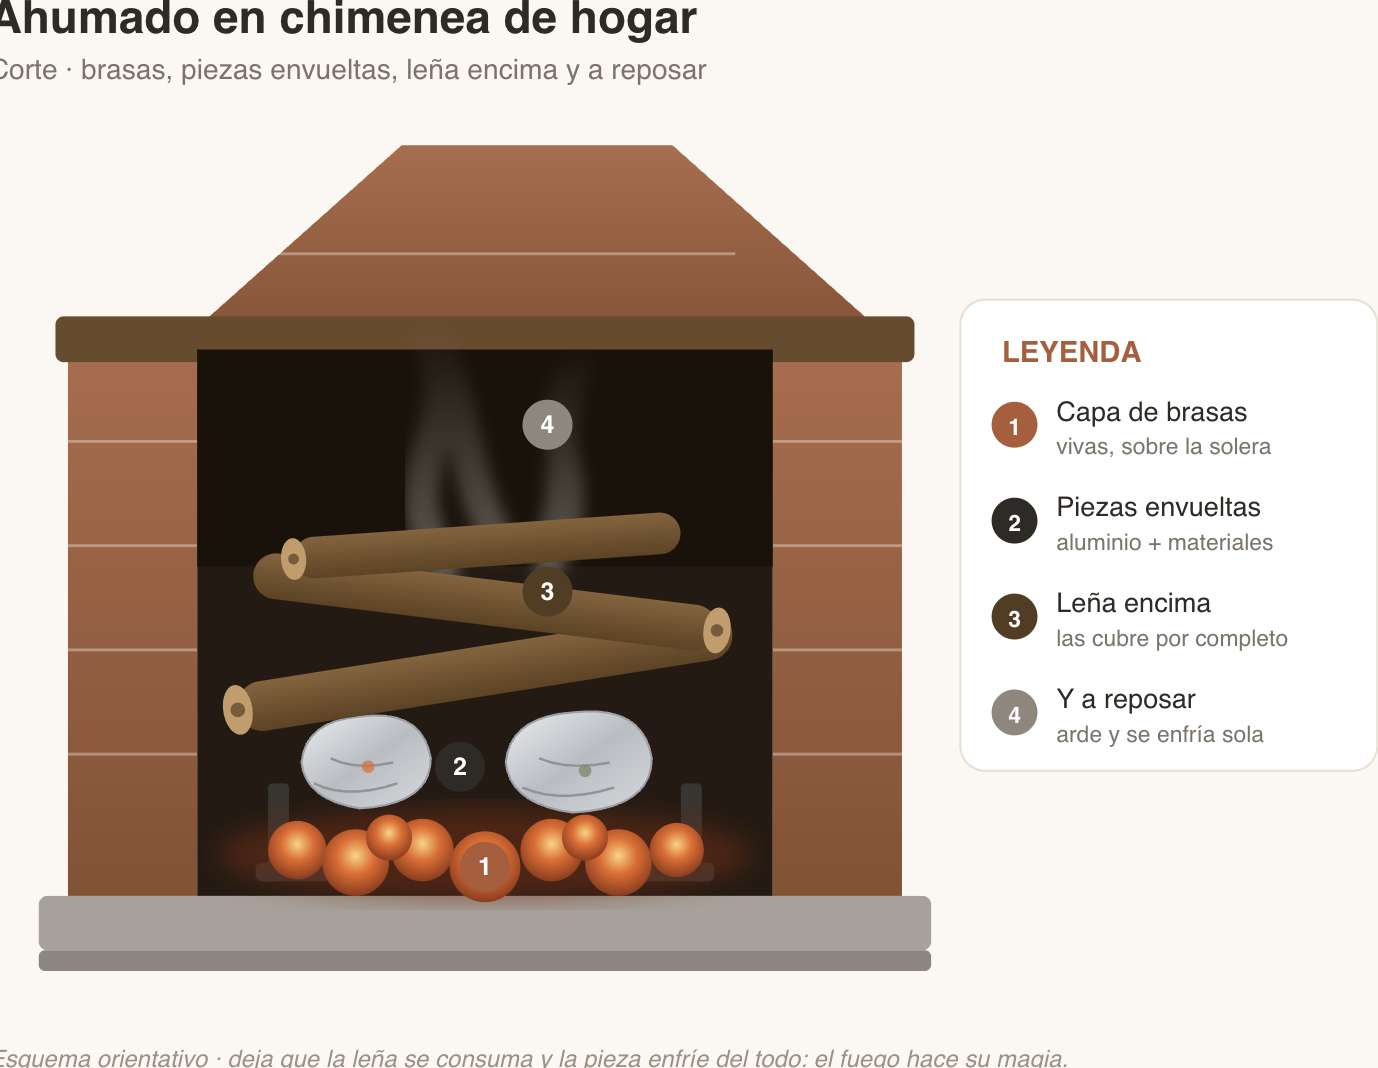
- **Wrap the materials.**Surround the piece with copper, onion, salt and sawdust, and hold it in place with aluminium foil without pressing too hard, spreading it well so it doesn't all pile up in one spot.
- **Place and cover partially.**Rest the piece on the embers and add some on top; don't bury it completely, let it breathe.
- **Moderate fire, 45 min – 1 h 30.**The key is a slow, steady combustion, no rushing.
- **Let it cool completely.**It can take 2–3 hours. If the foil comes out falling apart, that's completely normal.
- **Clean and protect.**With the piece cold, rub it with a soft cloth and, if you like, apply a very thin coat of wax to enhance the shine.
How to read the result
Opening the pit once everything has cooled is, without exaggeration, one of the most exciting moments in ceramics. You'll see areas as black as ink where the smoke concentrated, warm halos at the edges of the organic material, plant silhouettes and, with luck, a flash of copper that seems impossible.**
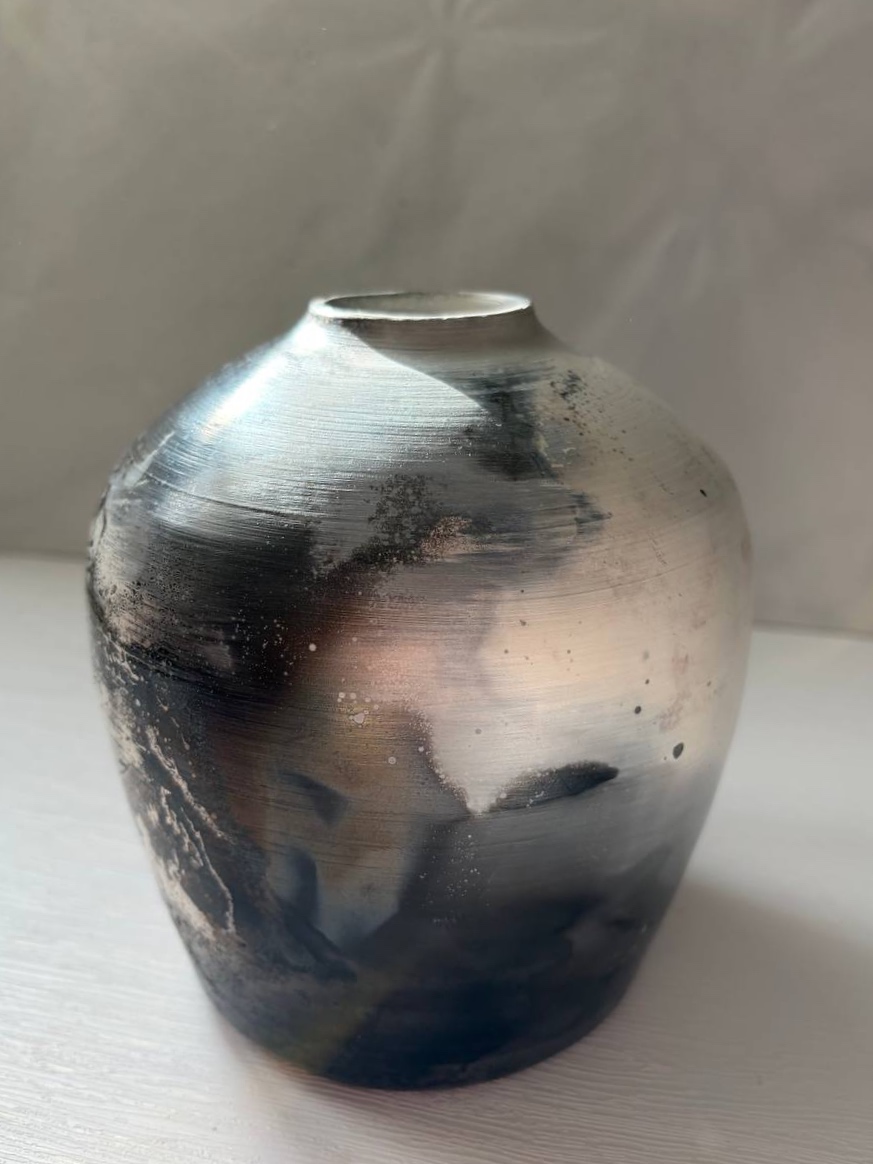
Flashes of copper
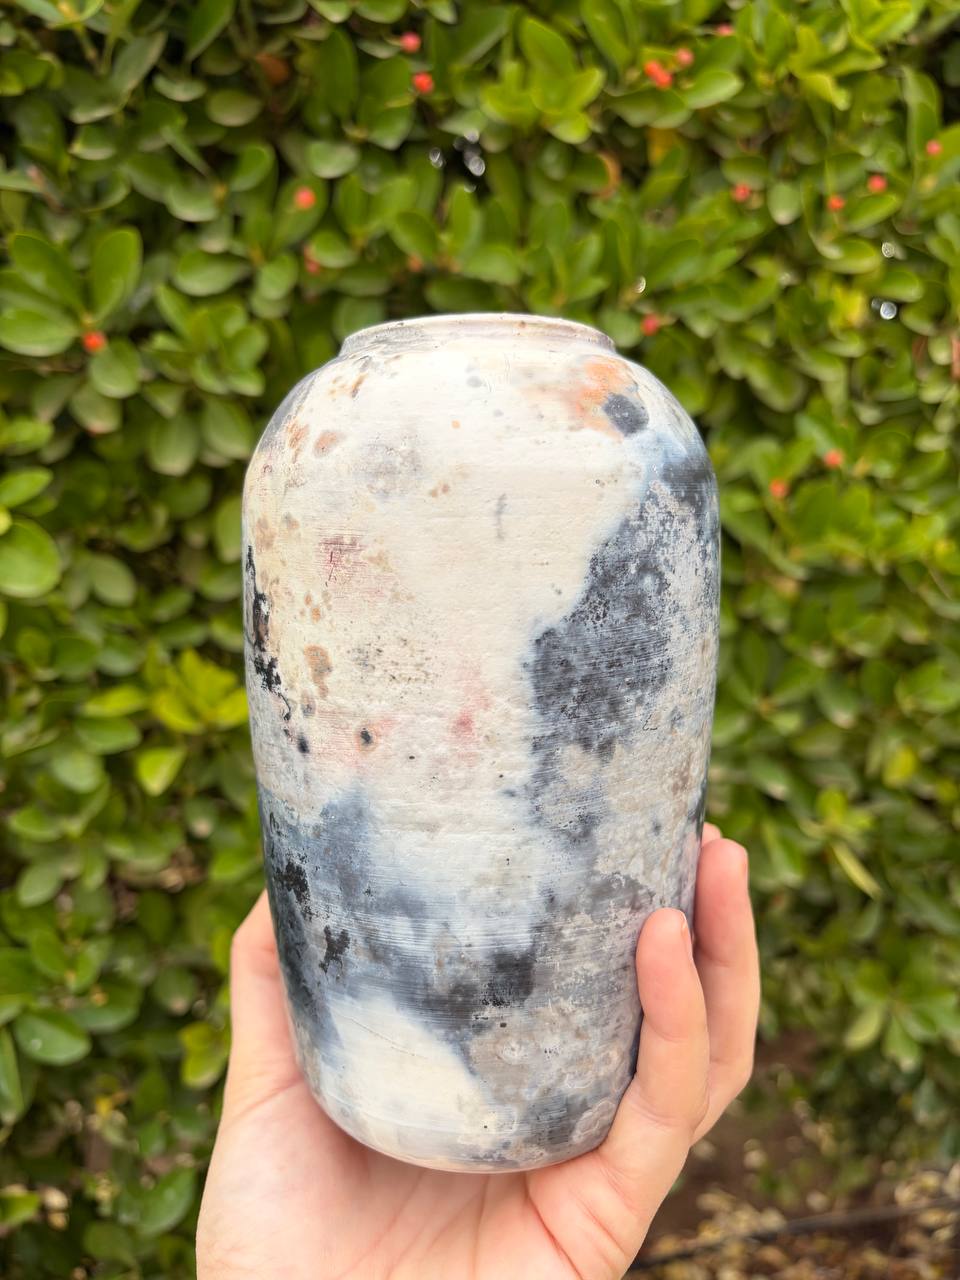
Warm blushes
Sometimes the piece you'd written off as «unremarkable» turns out to be the most beautiful, and the one you looked after so carefully comes out calm and understated. Both are valid: there are no mistakes here, there are records of what happened that night beside the fire. An honest, practical note: pit-fired pieces are not waterproof or food-safe; their value is decorative and expressive, and being clear about that from the start lets you enjoy the technique for what it is.
Final result
What comes out of the pit is ceramics with an almost metallic effect, shifting tones and a texture that seems to tell its own story. No piece is the same as another, and that is —truly— the magic of smoke firing in a pit. Your job is to set the stage well: polish, choose the materials, build the pit with care and light it with patience. The rest, leave it to the smoke.
If you haven't tried it yet, I wholeheartedly encourage you to do so. All you need is patience, fire and a desire to play with the alchemy of clay. Keep a notebook, note down what you put in and where, and little by little your intuition will sharpen… even if the fire always saves some surprise for you. ✨
Related videos
Videos embedded from Instagram (Meta), which may set its own cookies. They load when you reach this section.
12520
Comments(0)
No comments yet. Be the first to write one!