
25 Aug 2024
And you, do you already know about gelli printing?
Gelli Printing is a monotype printing technique that uses a gel plate to create unique, artistic prints. This technique is especially popular among artists and art enthusiasts thanks to its versatility and ease of use.
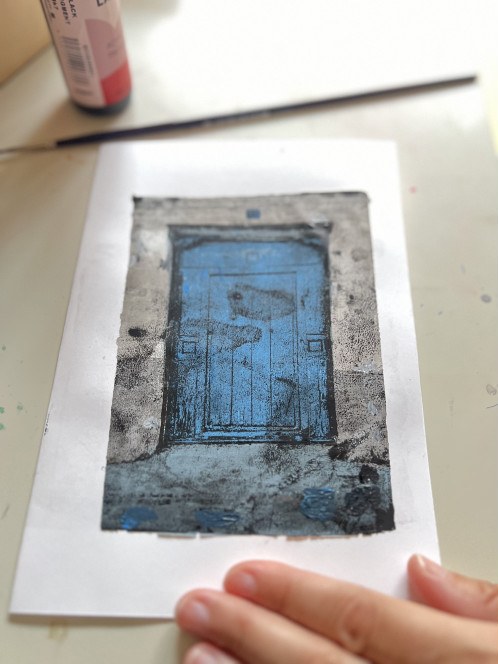
In this post, we'll focus on how to use Gelli Printing to make photo transfers, including the necessary treatment of the photograph and the reverse painting process to transfer the image onto paper.
What is Gelli Printing?
In my case, I've used the Gelli Plate by Gelli Arts, which you can buy at this link:
15 X 15 cm PLATE: GELLIPLATE 15X15 BY GELLI ARTS ON AMAZON
20 X 25 cm PLATE: GELLIPLATE 20X25 BY GELLI ARTS ON AMAZON
There are more sizes, but these two are ideal for starting to experiment.
Gelli Printing lets you create unique prints using a gel plate as the printing surface. This technique is ideal for experimenting with textures, colours and layers, and is especially useful for creating backgrounds and collages. The gel plate is reusable and easy to clean, which makes it a practical tool for any artist.
Photo Transfers with Gelli Printing
Photo transfers with Gelli Printing let you incorporate photographic images into your prints, adding an extra level of detail and personalisation. Here's how to do it:
Treating the Photograph Choose the Photograph: Pick a photograph with good contrast. Black and white images usually work best, since grey tones may not transfer properly. In another post I'll show you how I edit my images to get the most out of this technique.
Print the Photograph: Use a laser printer to print the photograph on plain paper. Inkjet prints won't work for this process; better a laser printer with a quality toner. Cheap toners leave a matte finish that won't repel the black acrylic.
You can also try with magazine cut-outs that have great contrast in the image or that are already in black and white.
Prepare the Photograph: Trim the photograph to the desired size and make sure it's clean and dry.
Reverse Painting Process Apply the Paint to the Gel Plate: Use a thin layer of dark acrylic paint on the gel plate. The paint shouldn't be too thick, to allow a good transfer. Use a roller so the layer is thin and even.
Place the Photograph: Place the printed photograph face down on the paint on the gel plate. Press lightly to ensure good contact (what has worked best for me has been to use the roller but WITHOUT PRESSING).
Remove the Photograph: Lift the photograph carefully. The image should have transferred part of the paint onto the gel plate.
Let the Paint Dry: Let the paint dry partially on the gel plate. This can take a few minutes.
Apply a Layer of Light Paint: Once the dark paint is partially dry, apply a layer of light acrylic paint over the gel plate. Let it dry between layers and finally, apply a thicker layer of acrylic to fix everything above onto the paper.
Transfer the Image to the Paper: Place a sheet of paper over the gel plate and press firmly. You can use a roller or your hands to ensure good contact, and put a book or a heavy, flat object on top.
Make sure to use paper of 200 gsm or more, since with the thick layer of acrylic it will wrinkle from the moisture.
Remove the Paper: Lift the paper carefully once it's dry. The transferred image should now be on the paper, creating a unique, artistic print. Touch it up if you think it's necessary with acrylic or using any other technique, for example, a marker.
Gelli Printing is a fascinating technique that offers endless creative possibilities. By incorporating photo transfers, you can add an extra level of personalisation and detail to your prints. With a bit of practice and experimentation, you'll be able to master this technique and create unique, surprising works of art.
I hope this guide inspires you to try Gelli Printing and to explore its creative possibilities! Have you ever tried this technique? What results have you got? Share your experience in the comments!
16390
Comments(0)
No comments yet. Be the first to write one!